Creating an Environment on Tempest
Environments are useful for handling dependencies of packages. Environments are typically used for Python and R.
Mamba is a drop-in replacement for Conda; Mamba is preferred because it is faster than Conda.
Creating a Custom Mamba Environment
Mamba environments allow you to define a specific set of packages that will operate together. For example, if you had a python script dependent on Python 3.12, you could create a mamba environment with Python 3.12, and run the script inside of that environment.
The below documentation is pulled from Mamba's documentation.
Set Up Mamba
If Mamba has not been used before, or you are wanting to use a new version, you must initialize and set up Mamba.
First we need to load mamba module. Search mamba modules (available on tempest)
ms mamba
This will show a list of available mamba modules, select the latest one, or the one that is required.
Then load the selected version of mamba module.
module load <selected-module>
In this example we use the latest version of Mamba, so our command will be
module load Mamba
Initialize mamba using the following command. This needs to be called only once per version.
mamba init
Mamba init simply adds some commands to your ~/.bashrc file. To make Mamba available, we need to source the ~/.bashrc file:
source ~/.bashrc
Mamba only has to be set up once per version. In future sessions, when you want to use Mamba, you just need to source your ~/.bashrc file.
Create a New Mamba Environment
Now, you can create the new mamba environment. The mambacreate command creates a new environment. You can create an environment with the name <name of env>by calling:
mambacreate-n <environment name> <listofpackages>
After this process has finished, you can activate the environment by calling mambaactivate<nameofmyenv>.
For example, to install Jupyter Lab from the conda-forge channel into an environment called myjlabenv, you would run the following:
mambacreate-nmyjlabenvjupyterlab-cconda-forge
Then run the following to activate the environment:
mambaactivatemyjlabenv
Once an environment is activated, mambainstall can be used to install further packages into the environment:
mambainstallbqplot# now you can use bqplot in myjlabenv
mambainstall"matplotlib>=3.5.0"cartopy# now you installed matplotlib with version>=3.5.0and the default version of cartopy
Create a Mamba Environment from a YAML File
To create a new mamba environment using yaml (Yet Another Markdown Language) file. Go to Files in tempest, and create a file with extension .yaml.
The syntax for a .yaml file is the following:
name: <environmentname>
channel: <channel-name>
dependencies:
    - <package1>
    - <package2>
    - .
    - .
    - <packagen>
Example for this is
name: jupyter-numpy-env
channel: conda-forge
dependencies:
    - python
    - ipykernel
    - numpy
Next we will create the environment using this yaml file.
If you already have an active mamba environment, first deactivate it:
mamba deactivate <environment name>
Now for creating the environment from from yaml, use the following command:
mamba env create -f jupyter-numpy-env.yaml
After this process has finished, you can activate the environment by calling mambaactivate<nameofmyenv>. Example for this is as follows:
mamba activate jupyter-numpy-env
Update a Mamba Environment from a YAML File
To update the mamba environment from a YAML file, add or remove libraries in the YAML file and run the following command to update the environment
mamba env update -f jupyter-numpy-env.yaml
Using Mamba Environments in Jupyter Lab
Add the Environment Jupyter Lab
Make the environment accessible to Jupyter by running the following:
python -m ipykernel install --user --name=jupyter-numpy-env

#this name will show in the kernel list in jupyter notebook
Test the Kernel
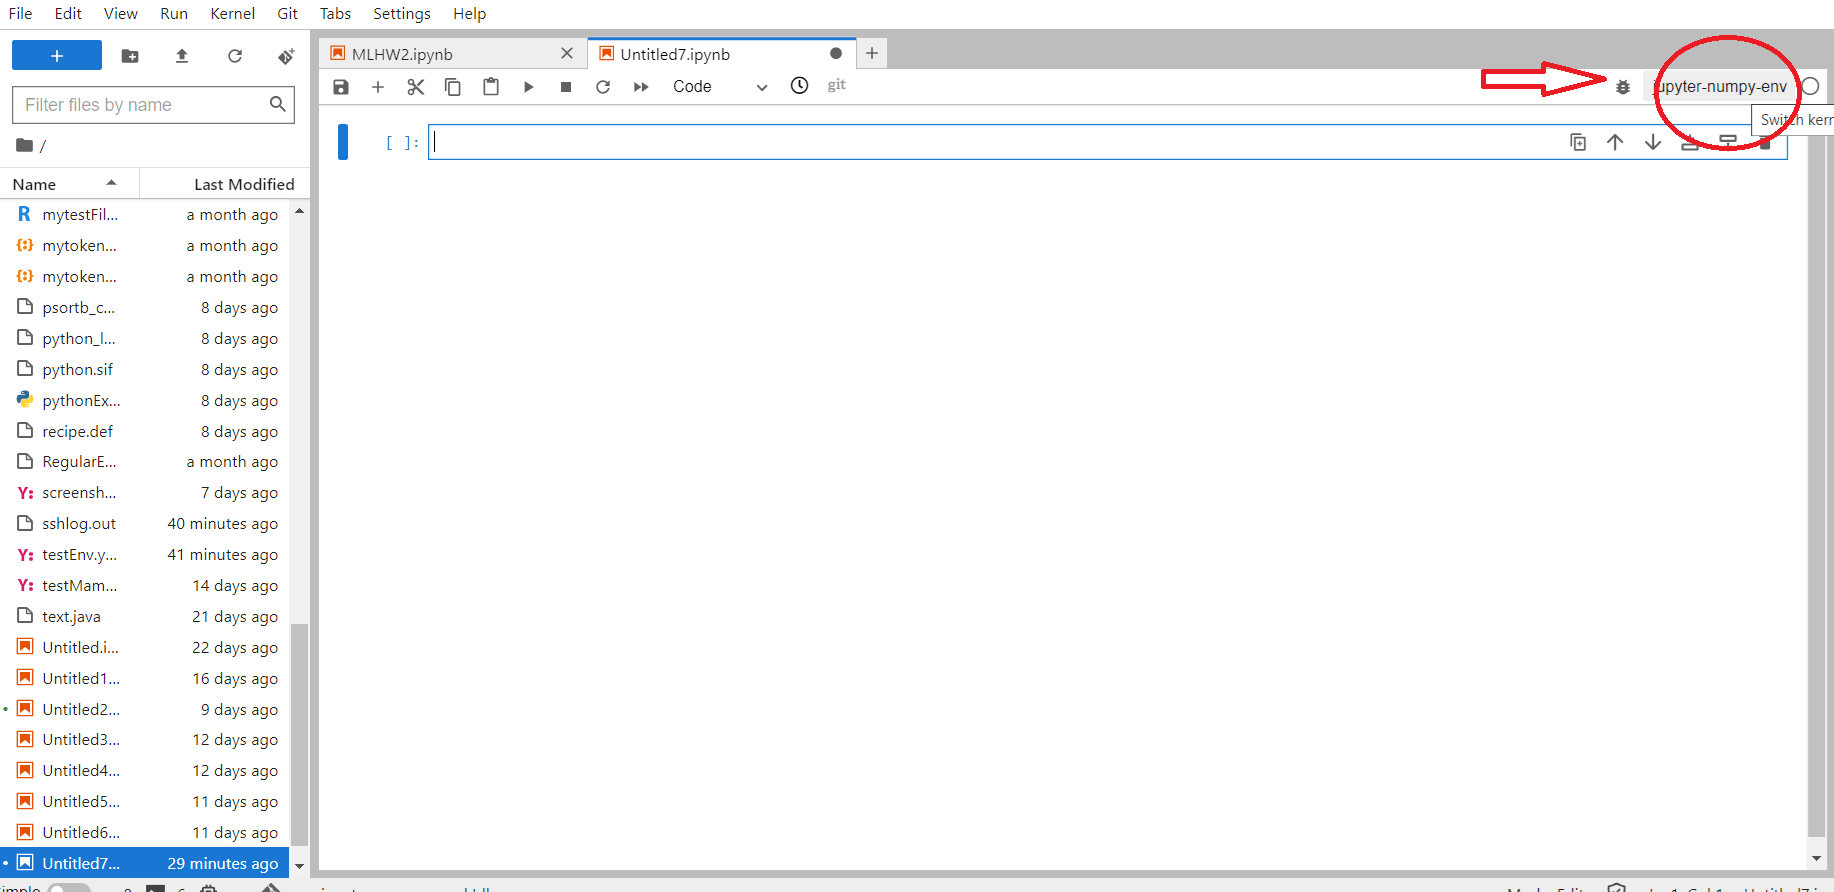
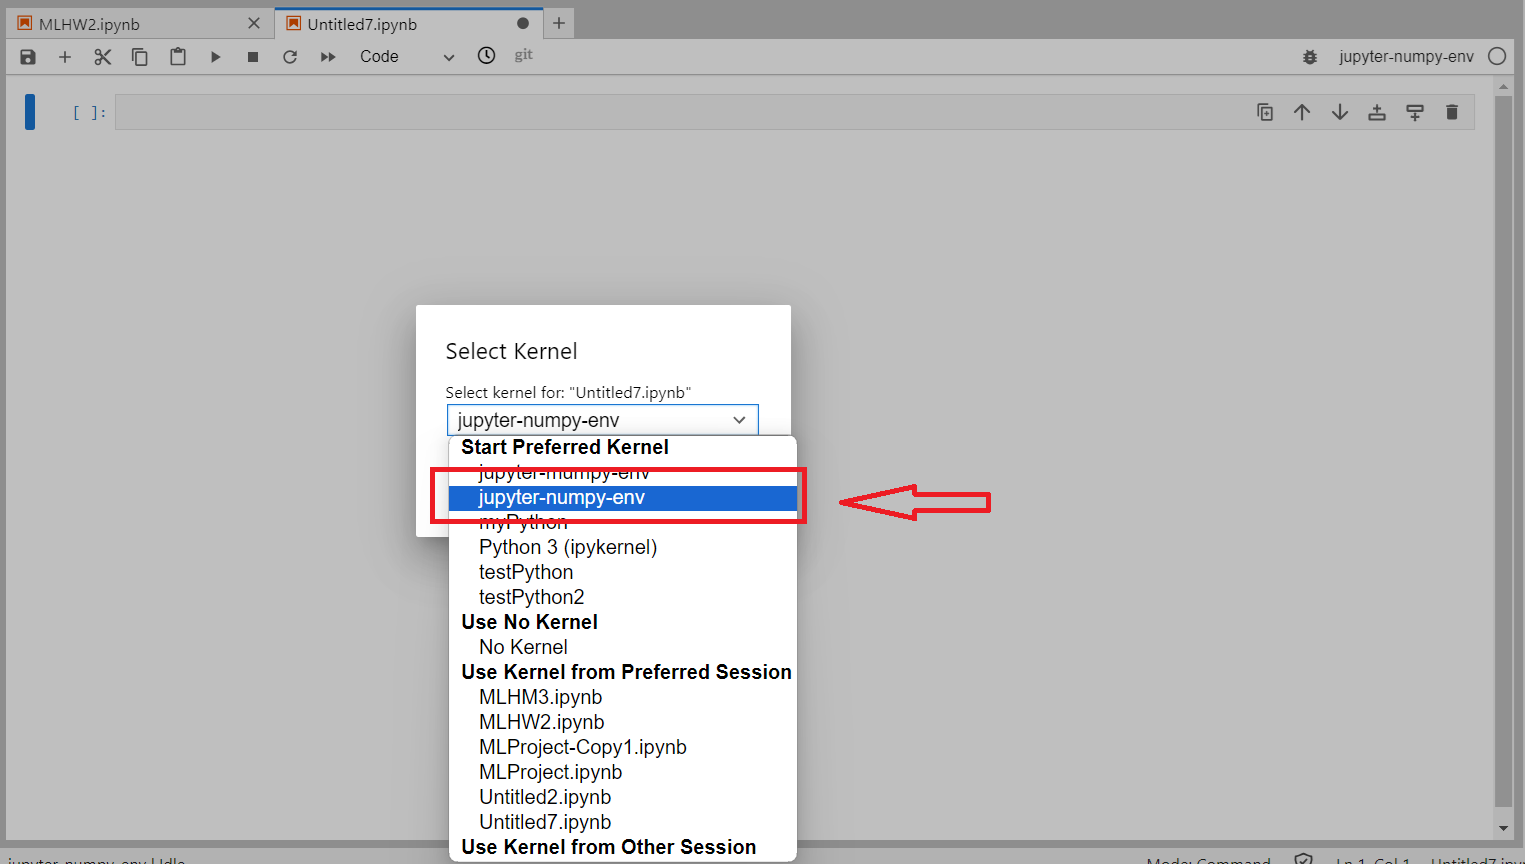
Once you launch Jupyter Notebooks, select the kernel dropdown in the upper right of the screen and select your newly created kernel. In the example code above, this name would be jupyter-numpy-env. Then restart the kernel in the toolbar. This should result in your Jupyter Notebook running on the new kernel.

Once you hit the text appearing in the upper right corner of the screen, a selection bar will appear, as shown in below image. To use your new environment, select the appropriate kernel from the list.

